Showing posts with label sizzix. Show all posts

Tuesday, July 17, 2012

CHA!

Hello!  Today was the first "official" day of CHA and I was lucky enough to be there!  If you were there, you would have seen me at the Scrapbook Adhesives by 3L booth - with some of my fellow design team members...


Now that CHA is upon us, I am VERY excited that I get to share my projects that I made with all of you!

I made a gift set with matching card, gift bag and bottle tag.


All of the items featured glitter and flocking as unifying elements :-)


Thanks for stopping by!

Kristen

Wednesday, September 14, 2011

Inspiration Showcase - Day 1 Card

Hello :-)

I am participating in an online class by Jennifer McGuire called Inspiration Showcase. So far it has been chock-full of great information.  Our first day was all about resist techniques - and I will be the first to admit, this is something I have NOT used before.  I think it's growing on me!


For my card, I embossed the Mehndi medallion stamp onto the ghost, and then inked the rest of him in Peeled Paint ink.


I then added a button, twine and tiny tag to finish it off -


I am very happy so far with all the information in this class - I learned a lot about resist - even though I chose the simplest of techniques to work with here!


Wednesday, August 3, 2011

Garden Note Cards


Hello Everyone!
Today, I am sharing a set of note cards that I did for the SCRAPBOOK ADHESIVES BY 3L booth at CHA.  I created a set of 6 note cards - each one a little different.
For the seed packet (hanging on the basket), I stamped and die cut the seed packet frame from a piece of vellum to which I had applied an Adhesive Sheet.  

Thanks for looking!
Kristen

Supplies:

Paper: Pasta Fagioli (Jillibean Soup); Vellum & Textured Cardstock (Paper Studio)
Stamps: Garden Variety, Botanical Silhouettes, Tiny Tags (Papertrey Ink); Vegtastic (PaperSmooches)

Ink: Wild Honey, Peeled Paint, Brown Sugar, Chili Powder, Seed Packet, Fountain Pen (Ranger); London Fog, Timber Brown (Tsukineko)
Other: Crinkle Ribbon, Twine, Buttons
DieCuts & Punches: Seed Packet, Tiny Tags, Seed Packet Frame, Garden Variety, Sending You, Beautiful Blooms (Papertrey Ink); Label (Spellbinders); Scallop Card (Sizzix); Circles, Butterfly (Ek Success); Edger (Fiskars)

Wednesday, May 4, 2011

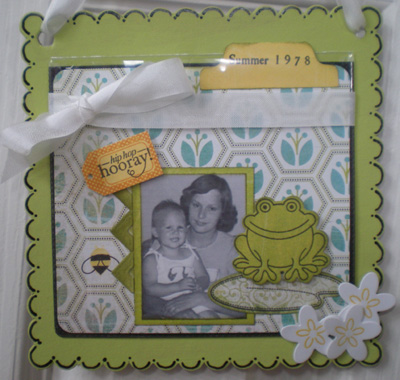
Happy Mother's Day! Mini Scrapbook Page Holder

Hello and a happy early Mother's Day to all you moms out there!! 

Be sure to hop on over to the Crafty Power Blog at SCRAPBOOK ADHESIVES BY 3L to see my post!  I made a mini scrapbook page holder - perfect to give your mom as a gift :-) You just have to keep up with sending her a new page every so once in awhile!


Happy Mother's Day!!
-Kristen

Wednesday, April 13, 2011

Upcoming Card Class :-)

Hello!  I am so excited - I am teaching a little card class next week!  My cousin asked me to come to her women's group meeting and teach them how to make a few cards.  The cards will be donated to their church to be used for members that may be ill or have recently experienced a loss.  Below are the cards we will be making - the trick was to keep them simple and neutral - so they would have the greatest variety of uses. 


Have a great week!
-Kristen

Thursday, March 31, 2011

Basic Grey Curio Album

Today I wanted to share a 6x12 album that I made using Basic Grey's Curio line.   I love this line - it is so vintage and so botanical (working at a nursery on the weekends gives me a great appreciation for nature!).  Below is the cover of my album - I love all the layers :-) 


Have a great weekend :-)

-Kristen

Saturday, March 5, 2011

Rejected!

Well, my cards did NOT get picked for the latest Papercrafts submissions call - but I decided to play along with all of the other people that got the same (or lack of) news...  Amber is sponsoring a Reject Blog Hop and I am participating!  Here are my 2 rejects:


Have a great weekend!

Monday, January 31, 2011

Happy Valentine's Day!


Ok, Ok, I KNOW it's early... but as I am taking a small detour to the land of the very special mouse (DISNEY!) very shortly, I thought I better put this post up before I leave :-)

A good friend asked me to make little notepad holders for her Bunco Group for Valentine's day...and this is what I came up with... Each holder holds a 4x4 notepad and is all decked out for Vday!
Thanks for looking!

Supplies
Stamps - Papertrey Ink - Tiny Treats Valentines
Patterned Paper - LYB
Cardstock - Bazzill, DCWV
Ink - Stazon and Distress Ink - Dusty Concord
Pen - Pentel White gel
Punches - Fiskars, EK Success, Martha Stewart
Dies - Sizzix
Dew Drops, Ribbon
Chipboard and 4x4 Sticky Notepad

Saturday, January 1, 2011

Happy New Year!


Today’s project is a super simple New Years Top Hat – with just the right amount of bling!

The top hat pattern is courtesy of the Graphic 45 blog (CLICK HERE for the pattern)
I wanted my top hat to be black – but I can’t print the pattern onto the black cardstock or I wouldn’t be able to see it. I printed the pattern onto white paper and then switched out my MyStik™ Permanent Strips Refill for my MyStik™ Repositionable Dots Refill. I adhered the pattern to the black paper using the MyStik™ Repositionable Dots.


Next, I cut out the three pieces.


Once cut out, I carefully peeled off the white paper – which left the MyStik™ Repositionable Dots residue on the black pieces. I simply rubbed the residue with my finger until it quickly and easily rubbed off without a trace!


I assembled the top hat using the MyStik™ Permanent Strips. Once assembled, I used the Crafty Power Tape around the hat to adhere the decorative fabric trim.


Next, I stamped the banner and sentiment and made the blue flower. For the glittery star, I used Adhesive Sheets that had been adhered to cardstock, and then punched the star shape out. I peeled the backing off and applied the glitter.


The last step is to adhere all the embellishments using Foam Squares. For this project, I used the Black Foam Squares since they would blend seamlessly with the hat.


Happy New Years everyone!
Supply list:

Scrapbook Adhesives by 3L™ MyStik™ Permanent Strips, MyStik™ Repositionable Dots, Crafty Power Tape, Foam Squares
Paper –Black and Teal Cardstock, Prism
Stamps – Lawn Fawn Stamps - Bannerific and Jessie's ABCs
Ink – Stazon, Ranger Distress Ink – Tea Dye, Black Soot
DieCut Flower – Sizzix, Star Punch – EK Success
Lace Trim – unknown
Glitter - unknown.

Tuesday, December 28, 2010

Holiday Coasters Hostess Gift


First, I started by stamping my images onto a 4x4 ceramic tile. Next, I put Crafty Power Tape around the perimeter of the tile.


Once the Crafty Power Tape was down, I removed the backing, and then added FloraSoft in Vintage Christmas.

Once the FloraSoft was adhered, I used a small paintbrush to gently brush off any stray pieces. The result is a perfect perimeter of color, texture and interest. I repeated the above steps until I had a set of 4 coasters.


To assemble the hostess gift – I still needed to make a tag to tie up with the coasters. I started by stamping a holiday image and then coloring it in with Copics and White gel pen.


Using the MyStik™ Permanent Strips – all “decked” out in my Christmas Paper - I attached the paper strip to the diecut tag. I also used it to adhere the circle to the scallop. The scallop was then adhered to the tag using Foam Squares.


The last step is to tie the four coasters together, and then tie your tag into the bow. I used twine and added some festive berries to complete the gift.


Happy Holidays everyone!

Supply list:
Scrapbook Adhesives by 3L™ MyStik™ Permanent Strips, Crafty Power Tape, Foam Squares
Paper –Basic Grey, Kraft Cardstock
Stamps – Papertrey Ink, Lawn Fawn Stamps
Ink –Tsukineko Stazon, Copic Markers, Pentel Gel Pen
FloraSoft
DieCut Tag – Sizzix, Circle & Scallop Punches – EK Success
Twine
Limestone Tiles

Sunday, December 26, 2010

7 Gypsies Printer's Tray Christmas Project

I hope everyone had a great Holiday :-) Today I wanted to share a printer's tray project that I did for my mom and my cousin this year. The picture below is the one I did for my mom. I decorated a 7 Gypsies tray with vintage elements and old family photos. I really had fun with this one!


There are so many elements to this tray!! I used game pieces, light bulbs, spools, cards, stick pins, buttons...the list goes on! Here are some close ups:

Here is a ticket I hand stamped using Tim Holtz Stampers Anonymous Stamps and his ticket strip die cut from Sizzix.

An oh-so-cute picture of my brother and I, a domino, a Maya Road vintage stick pin, and a light bulb.

Vintage order sheet by Jenni Bowlin and a handmade rosette.

Bingo Chips by Maya Road, Playing Card, Dice, button and another Maya Road stick pin.

Mini Ticket strip by Maya Road, and a Scrabble piece.
Vintage key, and a handmade rose made of old book pages.

Bird die cut from Sizzix and stamps by Lawn Fawn.

Happy Holidays everyone! :-)
Related Posts Plugin for WordPress, Blogger...