Tuesday, December 28, 2010

Holiday Coasters Hostess Gift


First, I started by stamping my images onto a 4x4 ceramic tile. Next, I put Crafty Power Tape around the perimeter of the tile.


Once the Crafty Power Tape was down, I removed the backing, and then added FloraSoft in Vintage Christmas.

Once the FloraSoft was adhered, I used a small paintbrush to gently brush off any stray pieces. The result is a perfect perimeter of color, texture and interest. I repeated the above steps until I had a set of 4 coasters.


To assemble the hostess gift – I still needed to make a tag to tie up with the coasters. I started by stamping a holiday image and then coloring it in with Copics and White gel pen.


Using the MyStik™ Permanent Strips – all “decked” out in my Christmas Paper - I attached the paper strip to the diecut tag. I also used it to adhere the circle to the scallop. The scallop was then adhered to the tag using Foam Squares.


The last step is to tie the four coasters together, and then tie your tag into the bow. I used twine and added some festive berries to complete the gift.


Happy Holidays everyone!

Supply list:
Scrapbook Adhesives by 3L™ MyStik™ Permanent Strips, Crafty Power Tape, Foam Squares
Paper –Basic Grey, Kraft Cardstock
Stamps – Papertrey Ink, Lawn Fawn Stamps
Ink –Tsukineko Stazon, Copic Markers, Pentel Gel Pen
FloraSoft
DieCut Tag – Sizzix, Circle & Scallop Punches – EK Success
Twine
Limestone Tiles

Sunday, December 26, 2010

7 Gypsies Printer's Tray Christmas Project

I hope everyone had a great Holiday :-) Today I wanted to share a printer's tray project that I did for my mom and my cousin this year. The picture below is the one I did for my mom. I decorated a 7 Gypsies tray with vintage elements and old family photos. I really had fun with this one!


There are so many elements to this tray!! I used game pieces, light bulbs, spools, cards, stick pins, buttons...the list goes on! Here are some close ups:

Here is a ticket I hand stamped using Tim Holtz Stampers Anonymous Stamps and his ticket strip die cut from Sizzix.

An oh-so-cute picture of my brother and I, a domino, a Maya Road vintage stick pin, and a light bulb.

Vintage order sheet by Jenni Bowlin and a handmade rosette.

Bingo Chips by Maya Road, Playing Card, Dice, button and another Maya Road stick pin.

Mini Ticket strip by Maya Road, and a Scrabble piece.
Vintage key, and a handmade rose made of old book pages.

Bird die cut from Sizzix and stamps by Lawn Fawn.

Happy Holidays everyone! :-)

Sunday, December 19, 2010

Christmas Cookie Exchange - Cookie Packaging


Hi Everyone :-)  I know everyone is super busy with their own holiday to-do lists - and I wanted to show you a quick and easy packaging idea I did to hopefully inspire you, and to knock one more item off that dreaded list! This super simple packaging was made with a lunchbag, and scraps of paper I had on hand.  Of course I had to use stamps from my two favorite companies: Lawn Fawn and PTI!
Wish I could share the cookies that were inside! YUMMY!


Supplies:
Paper - Basic Grey
Stamps - Lawn Fawn and Papertrey Ink
Die Cuts & Punches- Sizzix, EK Success
Adhesives: Scrapbook Adhesives by 3L

Tuesday, November 30, 2010

Christmas Cards!

Wow... that blog hop must've taken a lot out of me - I haven't posted in over a week!   I have some really great projects on the horizon - but I can't quite share them yet ---- to hold you over - here are some cute and simple Christmas cards I did for my family this year :-)


Friday, November 19, 2010

Spellbinders™ Paper Arts Holiday Hoppin’ Blog Hop!


Welcome to the second day of the Spellbinders™ Paper Arts Holiday Hoppin’ Blog Hop!! Spellbinders, along with Scrapbook Adhesives by 3L™ are showcasing their newest products just in time for your Holiday crafting and gift giving. Lots of creative ideas are in store, as well as prizes galore! Each participating company has generously donated towards the prize package listed on the Spellbinders Blog. A total of two identical prize packages, one for each day, November 18 and 19 will be given away! To enter, just leave a comment on a participating blog! Comments in the first 48 hours of the post are eligible. One commenter each day will be randomly selected as the winner. Winners will be announced on November 22, on the Spellbinders Blog!


Be sure to see all of yesterday’s Holiday Hoppin’ blogs for inspiring projects and another chance to win!

Visit all of today’s Holiday Hoppin’ blogs:

Mona Pendleton
Gina Hanson
Deborah Young
Becca Feeken
Julie Overby
Kimberly Crawford
AJ Otto
Margie Higuchi
Beth Pingry
Jennifer Holmes
Kerry Urbatch
Shona Erlenborn
Tammy Inman
Jessica Turner
Brenda Hurd
Julie Koerber
Rae Barthel
Rachel O’Crowley
Kellie Fortin
Kristen Cohen   <----That's me!!!
Joy Dickson
Candy Rosenberg
Laura Craigie
Stephanie Hester
Leesa Crutcher 
Nina Brackett

Today I am using Spellbinders S4-290 Labels Fourteen die template and the following Scrapbook Adhesives by 3L™ products: MyStik™ Permanent Strips Dispenser, 3D Foam Squares , and Adhesive Sheets.

For my project, I created a festive fall Hostess set for Thanksgiving dinner. The ensemble includes table place cards, a candle centerpiece, and a menu of the day’s yummy goodness!

For the place cards, I scored and folded the largest die cut in order to make it stand up .  I inked the die cut with the name (which I pre-printed on my computer) to coordinate with the colors of the project.


I used the MyStik Permanent Strips Dispenser to attach the patterned paper to the folded brown cardstock.


The label with the name was attached using the 3D Foam Squares, as was the little leaf embellishment.


For the menus, I used the Spellbinders Label die in a vertical manner which fit perfectly with the shape and design of the menu card.


I cut out the menu (which was also preprinted using my computer) using the Spellbinders die, and then cut the patterned paper out using the next larger sized die.  I attached the menu to the patterned paper using 3D Foam Squares  and then attached the patterned paper to the rectangular card using the MyStik™ Permanent Strips Dispenser.


For the paper pieced pumpkin on the top, I stamped the pumpkin image four times: once on brown for the base, and three times on orange in order to cut and piece the image.  I also stamped a leaf on the green.  I then reassembled the image using 3D Foam Squares between each layer.


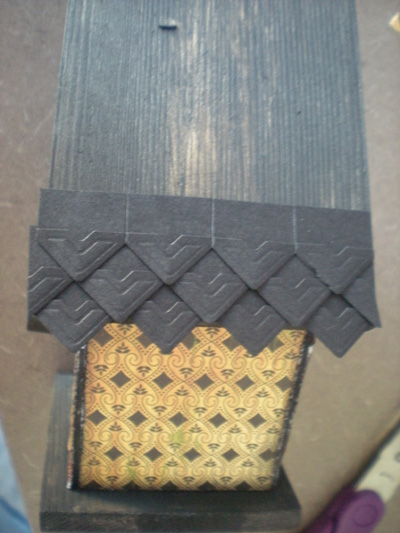
I adhered the patterned paper strip to the jar using the adhesive sheets- the edge to edge coverage ensures that the paper you adhere to the glass will stay put!


For the front of the candle, I die cut the labels and then stamped “Happy Thanksgiving” on the smaller of the two. Before adhering it (with the MyStik™ Permanent Strips Dispenser.) I also inked it to coordinate with the rest of the papers.  The last step is to embellish the front with stamped leaves (using 3D foam squares)

Supplies
DIES: Spellbinders S4-290 Labels Fourteen die template
ADHESIVES: Scrapbook Adhesives by 3L™ products: MyStik™ Permanent Strips Dispenser, 3D Foam Squares , and Adhesive Sheets
STAMPS: Lawn Fawn Stamps – Harvest Season
PAPER: Cosmo Cricket – Mr. Campy
INKS: Tim Holtz Distress Ink – Tea Dye, Stazon Ink - Black
FIBERS: Ribbon & Twine
OTHER: Jar Candle - Michaels


Simply leave a comment on my blog to be eligible to win the Spellbinders Holiday Hoppin’ Prize Package. One winner will be chosen from all the comments on all the blogs participating today. Comments made in the first 48 hours of this post will be eligible to win. Winner’s names will be published on the Spellbinders Blog on November 22, and they will have 48 hours to reply to Spellbinders to claim the prizes.


Thank you!
Kristen :-)

Thursday, November 18, 2010

HOLIDAY HOPPIN!

Be sure to check back tomorrow for a chance to win as part of the Spellbinders PaperArts Holiday Hoppin Blog hop!!!   Stop by their blog today to visit the participants from today and increase your chances of winning!

Monday, November 15, 2010

Halloween?!?!?! ...part deux!

Ok, this is the last one I promise!!! I am finally getting around to packing away my halloween decorations, and when I came across this one, I realized I hadn't yet shared it on the blog! This project was featured on the Scrapbook Adhesives by 3L(tm) blog originally - but I wanted to repost it here.

Birdhouses are not only for BIRDS... 

My favorite part of this birdhouse was the roof shingles that I made using Photo Corners.  I started by doing a few rows on the roof -

Then, to add interest, I inked a few of the ivory Photo Corners with my purple ink -

  ...and then added them into the rows of shingles every now and then to add a spook factor :-) 

How easy is it to create your own homemade Halloween decorations??
Thanks for stopping by!
-Kristen

Halloween?!?!?!

Ok, I know that Halloween has passed and we are almost at Thanksgiving... but I realised that I had some projects that I did that I wanted to share with you. Oops... better late than never, right? This project here was an alternative to plain old candy for trick or treaters... a simple 2-5-7-10 bag that I embellished for Halloween :-) I used Cosmo Cricket Haunted papers, a spider web border punch, and Papertrey Ink stamps.


Tuesday, November 9, 2010

Happy Holidays! Using up my scraps again!

So I always wrestle with whether or not to toss small pieces of scraps when I am done with my bigger projects.  Sometimes I feel like its more hassle to store them and remember where they are! I am starting to learn that if I use them right away - I solve both problems :-)  This is a super simple card I made using scraps from the BasicGrey Jovial line.  I inked the edges, and I used the MyStik Repositionable Dots Dispenser.  This allowed me to stick and move those scraps over and over again - until I got the placement JUST RIGHT! (without ruining my project)

Supplies:
MyStik™ Repositionable Dots Dispenser
Foam Squares (Scrapbook Adhesives by 3L™)
Basic Grey Paper - Jovial
Colorbox - Chestnut Roan Ink
Fiskars Heart Punch
Kraft Cardstock

Monday, November 8, 2010

Masculine Card :-)

I don't know why, but even as a self-proclaimed "tomboy" I still find it hard to do masculine cards.  Maybe its the patterned paper I am drawn to - or just my inner "girl" always wanting to come out, but masculine cards are a toughie for me.  That is - until I stumbled upon a great website that offered up the CUTEST digi designs known as "lollipops".  The designer is ByLORiDesigns and you can see more of her cute stuff here: ByLORiDesigns.

So here is a cute little card that I did for an Operation Write Home card party... for more information on this great cause click here: Operation Write Home

Friday, November 5, 2010

Christmas Gift Tags

Phew! I hadn't realized how long it had been since I last posted! Over a month! YIKES! Well, hopefully that will NOT happen again! Today I wanted to share with you some cute little Christmas gift tags I have been working on... featuring one of my favorite stamp companies... PTI! I made 4 sets of 12 gift tags, each set either has an elegant script or a simple clean font for the "TO/FROM" part.


I colored all the images with my Copic Markers...  here are some more photos up close :-)


so cute and simple! I have these tags listed on both eBay (just search for OTED) or in my NEW Etsy store:
creativesyzygy.etsy.com.  Thanks for stopping by!

Thursday, September 23, 2010

Pink Paislee Scrapfest Class - so AWESOME!

It's been a busy week - I am just returning back to normal after the hustle and bustle of Scrapfest in Minnesota.  I wanted to share with you a GREAT class I took from Pink Paislee called "Hocus Pocus Canvas Focus" where we made this cute wall hanging!  I modified the original design slightly - to put my last name on it instead of ENTER... but other than that its all Pink Paislee! Halloween is my favorite and this is already hanging in my house! :-)

Monday, September 13, 2010

Frankly, You rock!

Can I tell you just how much I {LOVE} Papertrey Ink stamps? Here they are again... I made this cute little Franky face card and needed a simple and small sentiment... the Tiny Treats set came through again!


Supplies: Stamp: Papertrey Ink; Polka Dot Paper: BoBunny; Circle Punches and Border Punches, EK Success; Gel Pen

Thursday, September 2, 2010

New Stamps from PAPERTREY!

I just had to try out these new stamps I just got from Papertrey Ink!!  You know I love Halloween and these stamps are too cute! This is from their Halloween Tiny Treats set.  What a great way to use up the BasicGrey scraps I had left over :-)


Happy Thursday!

Wednesday, September 1, 2010

Scrapfest 2010 is ALMOST HERE!

Is anyone else as excited as I am? After going every year, I had to miss last year - so now I am as excited as ever! What made it even MORE exciting is that I was asked to do a few projects for BasicGrey and Scrapbook Adhesives by 3L™ to display in thier booth!!!  I made three projects for the booth using three different lines from BasicGrey and of course, ALL my favorite adhesives from Scrapbook Adhesives by 3L™.

The first project was a little pail to bring with you on your travels! Long car rides always seem shorter when there is munchies involved! Just fill the pail with your favorite road trip snacks!


I was able to use the Adhesive Sheets from Scrapbook Adhesives by 3L™ to adhere the "doily" paper to the clear can - I got edge-to-edge adhesive -and NO visible adhesive is showing!


All the bits and pieces are from the Wander line from BasicGrey.  Brads, Epoxy Arrows, chip stickers, you name it! :-)


The next project, was made using the new Pyrus line from BasicGrey.  The fall colors are perfect for Thanksgiving, Autumn, or any Harvest celebration. 


How cute are these flowers? 
So easy to make - and they come out so vintage and grungy that i just {love} them!


The last project was for the Holiday Season using the Jovial line from BasicGrey.
Its a handmade treat bag (no dies here!) that I decorated up with awesome elements paper pieced from various papers in this line.  I also added some flocked foam squares - adhesive is for more then just BEHIND your projects!


Thanks for stopping by! Hope to see you at Scrapfest 2010!
Mall of America, Sept 17-19
Related Posts Plugin for WordPress, Blogger...